
Category Archives: decor
My Favorite Halloween Decor
Home Renovation: My Second Bedroom – Finished!
My husband and I purchased a 50+ year old house as our first home a few years ago. While the house only had one previous owner (they built it and lived in it their entire lives), we had a lot of updates to do as every room has three layers of wallpaper. You may remember my previous posts about our hall bathroom makeover, the master bathroom makeover and the master bedroom makeover.
We have officially finished our second bedroom! We use this room as our guest bedroom and wanted it to have a clean look so we could continually change out the accessories in the room.
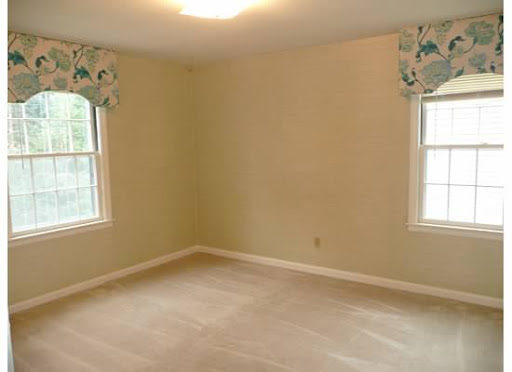
Here’s what it looked like before:
And, here’s my inspiration for the bedroom (thanks to House Beautiful for the image):

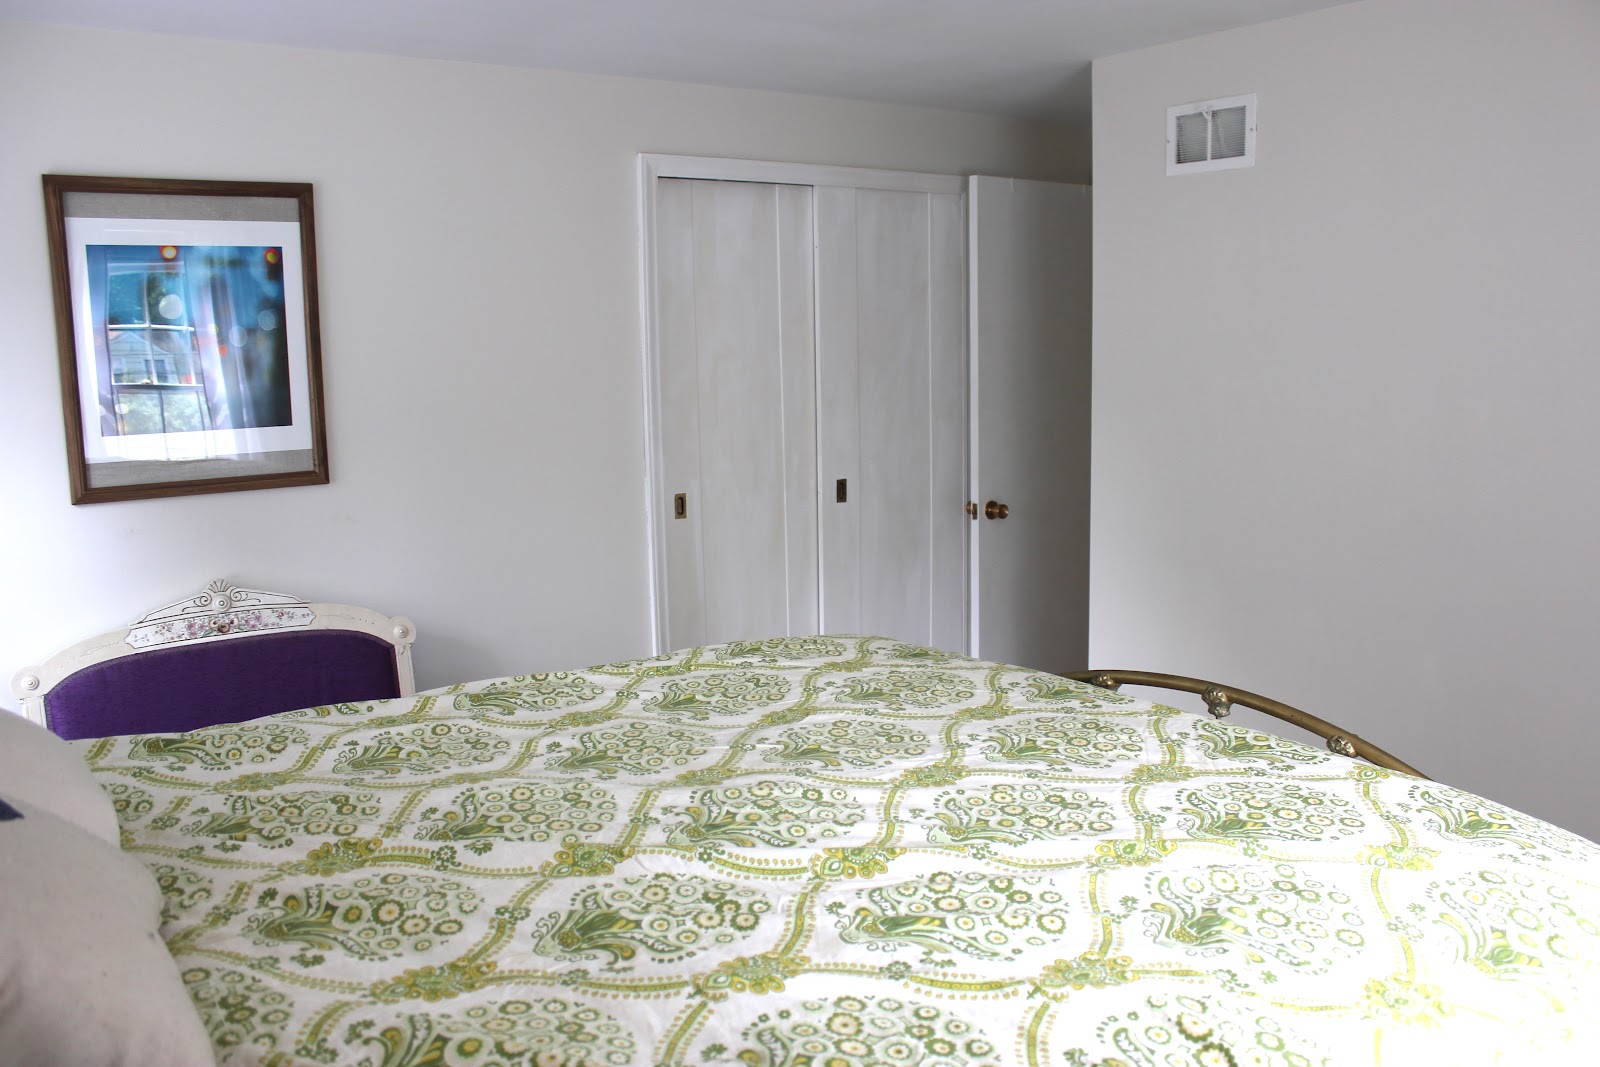
And, here’s how it turned out:


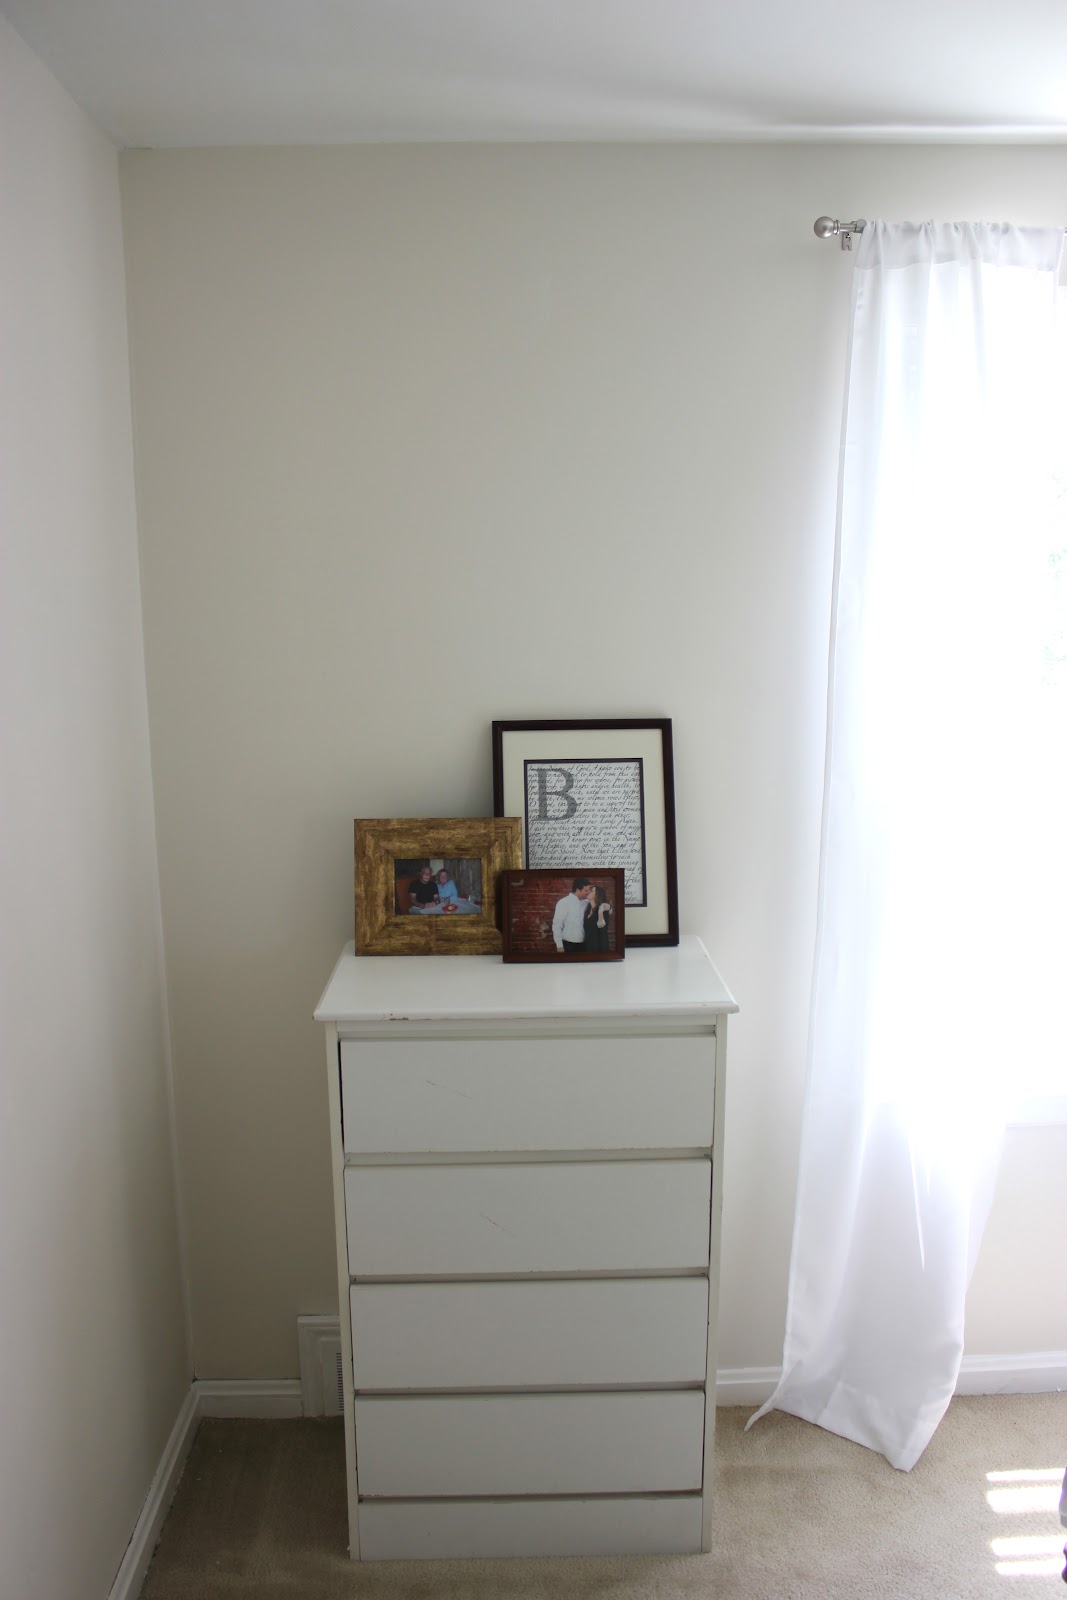

The specifics of the room:
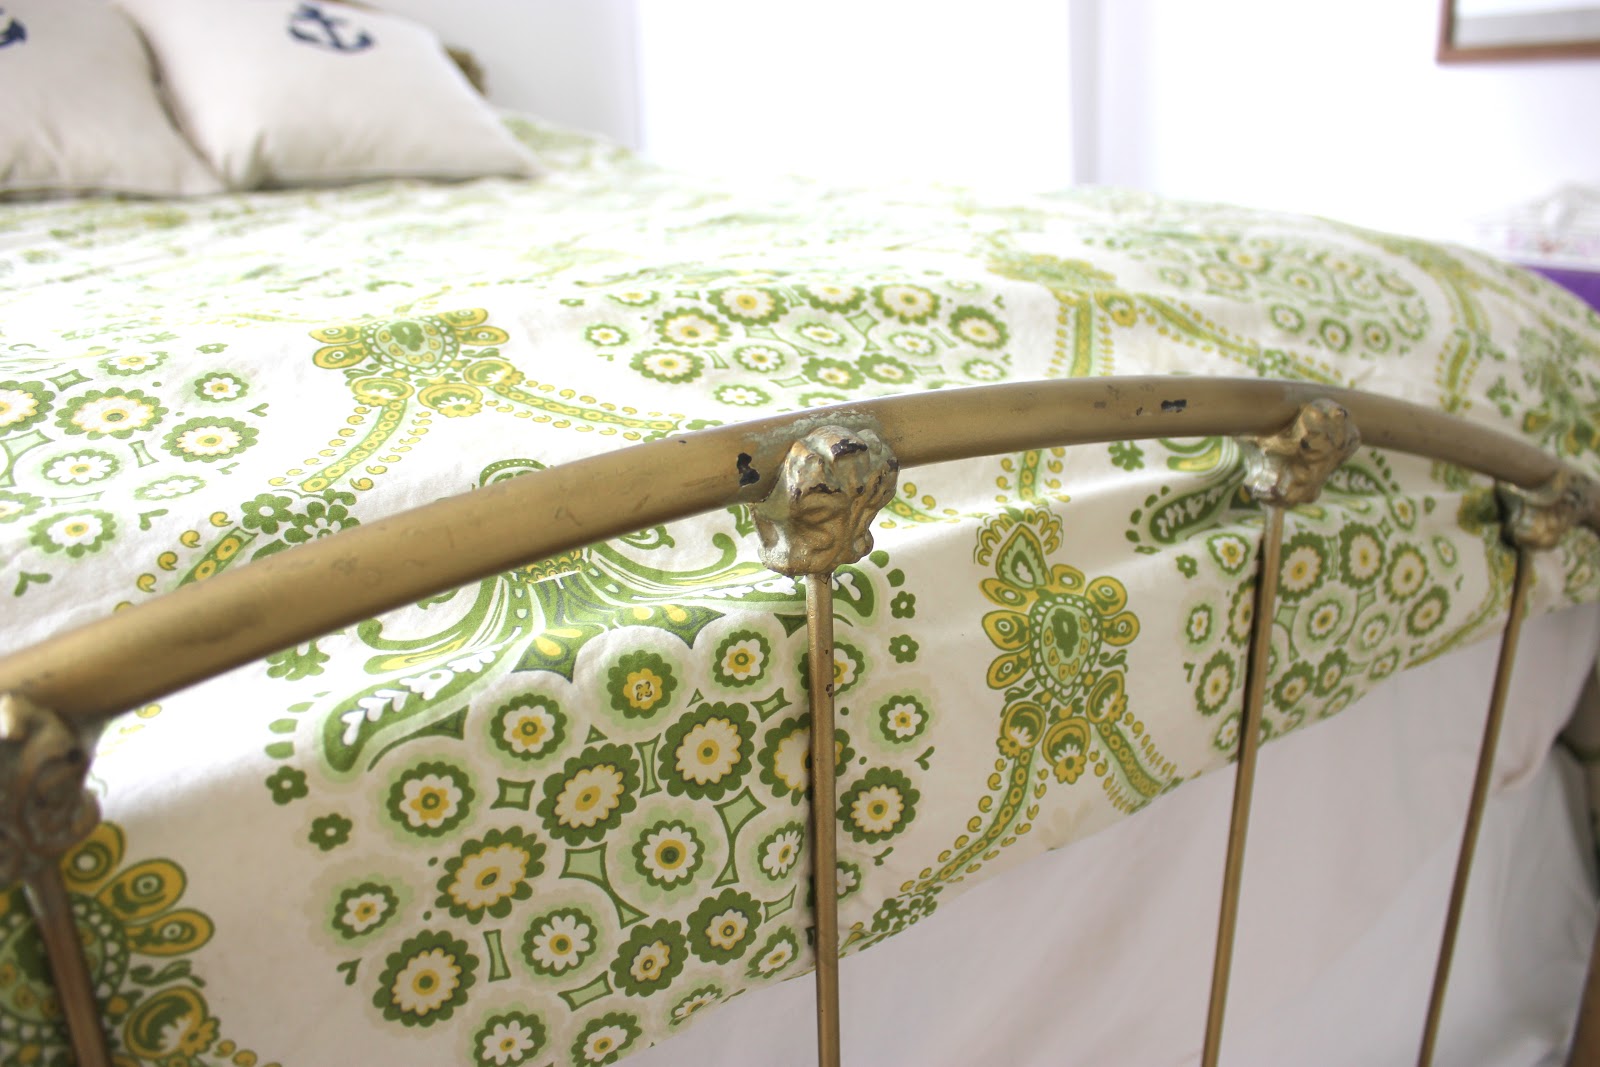
- The iron bed was my grandmother’s – similar to our master bedroom.
- The artwork is from a local photographer, Regnier Photography, and is of downtown Kansas City. I thought this would be perfect for guest room.
- Wall paint color is Oyster White from Sherwin Williams.
- Trim paint color is Bright White from Valspar.
- The curtains and rods are from Walmart.
- The new light is from Lowe’s.
- The dresser and night table are old pieces that were in the room.
- The comforter is from Anthropologie (three years ago).
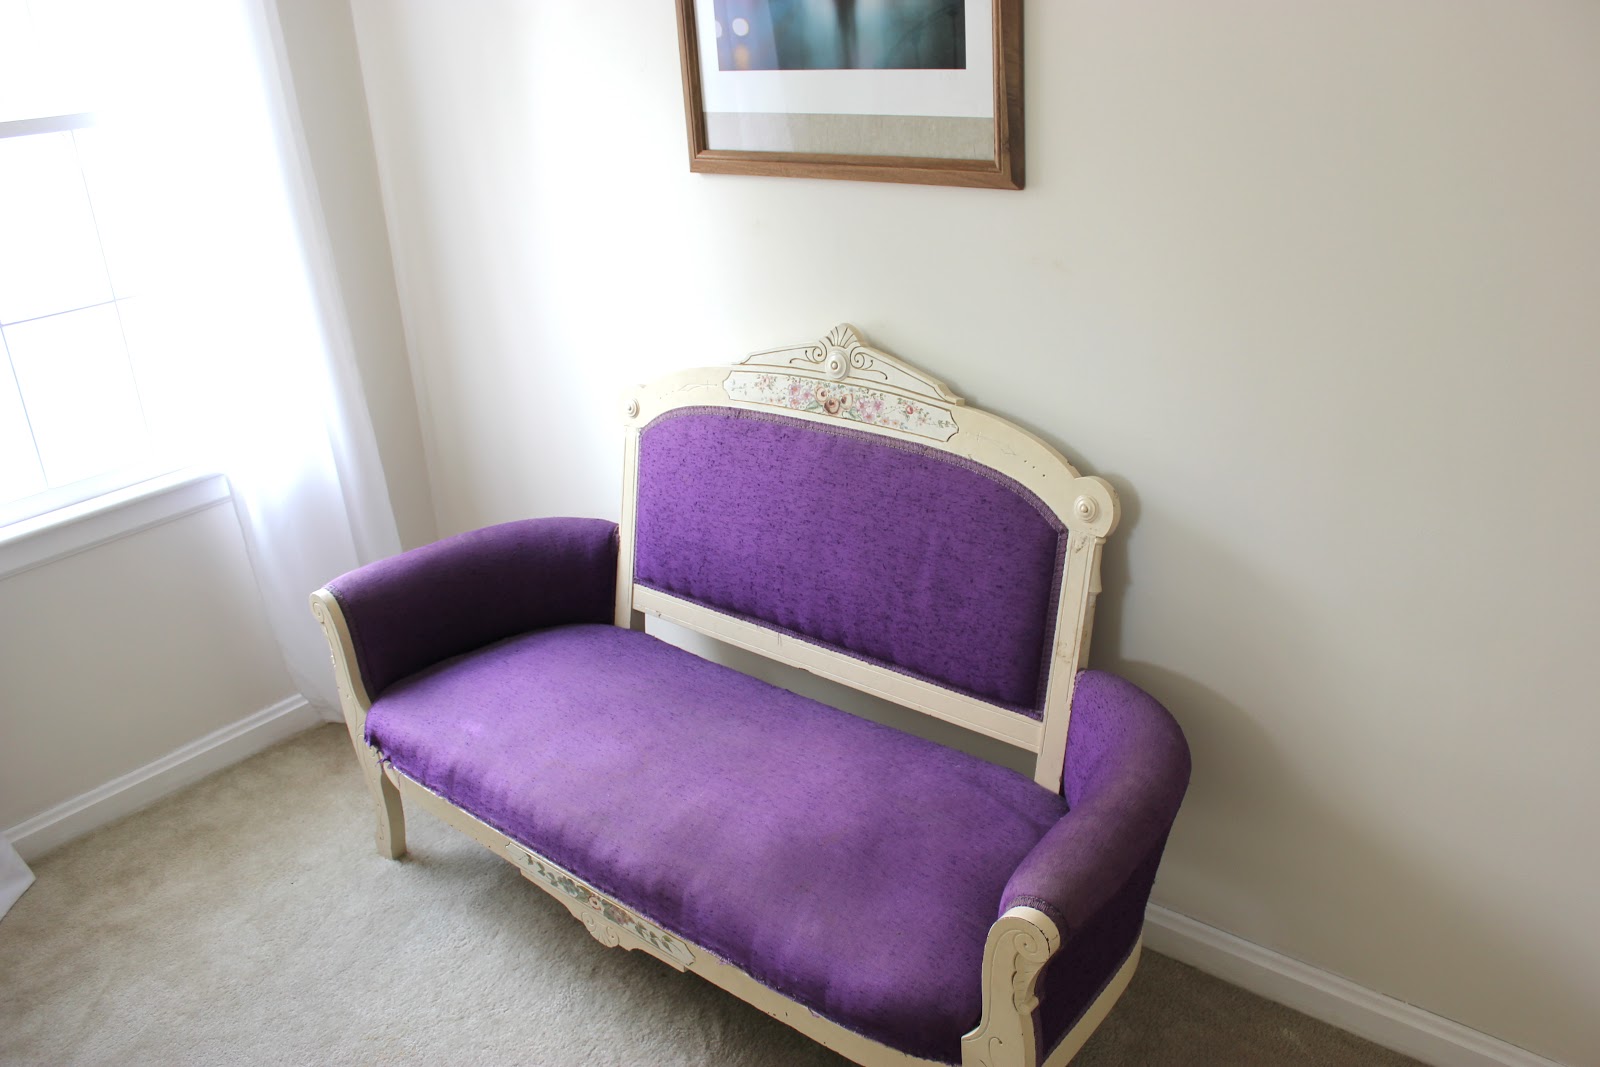
- My favorite piece is my grandmother’s wood couch. I will be attempting to re-cover it this summer.
Thanks again to House Beautiful for the inspiration.
What do you think? We still need to hang some more artwork (and we need to do that throughout the house).
Where to find us:
Facebook. Twitter. Pinterest.
Enjoy,
Ellen
Favorite Thing: Nell Hill’s
Can we call Mary Carol Garrity the Martha Stewart of the midwest? I think so! I mean she has her own paint now. I remember when she only had one store in Atchinson, KS. It was a treat to drive there with my mother to go shopping. We usually had lunch at the cafe on the opposite corner – which had the best chicken salad sandwiches. We would then walk over to Nell Hill’s, watching the ladies pull up their SUV’s to the back door to load up all their loot. Then I would walk in the store, feeling like a kid in a candy store.
When I finally got my own place, Nell Hill’s was the first place on my list to grab some essential items. And those items have stayed with me along my many moves to new apartments. At that time, I was able to work with Mary Carol herself, explaining I had a turquoise sofa and needed the right coffee table accessories to go with it. She offered to pull a few things from around the store and actually show me how they would look together in a display. I ended up leaving with some cute candy apply green jars and a few other knick knacks. And they looked great with my sofa!
She hands down has some of the best selection of glassware; ranging from vases, votives, apothecary jars, etc. Then when she added fabric and furniture, I was in heaven. And now she has a store only 5 minutes from my work. Yes, I have gone over my lunch break many times. Even if its just to get a break from the daily grind. Walking around her store is like being in a virtual magazine. The displays and set up offer customers many ideas of how they can incorporate the old with the new and possibly what they might have at home.
But the best part…the price points are within reason. I am not saying she doesn’t have some expensive items, but you can also find something really nice for only $10-15. What is your best find from Nell Hill’s? Pictured below are a few of mine.
Au revoir,
Jamie
P.S. Mary Carol is having her Spring Home Tour this friday, May 11 from 10 am – 4 pm. She has an open house at her house in Atchinson! For more details visit her web site. And she will have a HUGE tent sale on June 2 at the Briarcliff location. I plan on making at least one event, if not both.
 |
| Ornate Metal Wall Hanging – $26 |
 |
| Metal Antiqued Bird – $6 |
 |
| Candy Apple Green Vases – $12-15 |
 |
| Green Antique glass platter and robin eggs basket – $7 & $5 |
 |
| Lemons & Limes – $1.50 ea |
*Prices are based on memory – please do not mark my words and many items were purchases 5+ years ago.
Setting the Table: The Perfect Pantry.
As part of the continuation of our popular Setting the Table series, we asked our friend Stacy to show us how she is updating her Cape Cod home with her husband. She currently lives in Virgina but I have known her since we were young.
Please enjoy Stacy’s perfect pantry remodel. I would love to know if you have ever done anything similar to your pantry! Let me know on the comments section or on our Facebook page.
Jamie
Tschus
,Jamie
My husband and I bought our 1930s Cape Cod a year ago after falling in love with its classic charm and updated amenities. A nice perk was the large pantry with floor-to-ceiling shelving, but a large space didn’t mean more functionality right away. We noticed that we were unloading groceries on any open shelf. When we cooked together, we’d put items away in a different spot each time. Cake flour intermingled with the cashews; chickpeas blocked the chutney. Making matters worse, our pantry door has glass panels so our little secret was on display when we entertained.
When I’d had enough, I set off to Michael’s in search of an easy and cost effective solution. I purchased a stack of small wooden tags for less than $5, drilled a few holes, and applied two coats of leftover chalkboard paint. As the tags dried, I set about reorganizing my dried goods into a purposeful space. Lastly, I labeled the tags with chalk and tied them to the shelves with thin twine tied in a simple bow.

I chose ‘snack,’ ‘sip,’ ‘sweet,’ and ‘savory’ to cover my culinary categories, with ‘store’ on the bottom to house extra hand soap and supplies. You could also use craft paint to match your kitchen decor or use fun ribbon, but I liked the simplicity of the chalkboard paint and I also had plenty to spare.


In this picture you can see why I had leftover chalkboard paint. A few months ago I painted a chalkboard grocery list on the inside of our pantry door. It’s been handy to snap pics of the list with our phones before heading to the store. Another chalkboard paint idea to help with organization: try painting the inside of the cabinet door under your kitchen sink for an easy place to keep track of the last time you changed your air filters.

The beauty of using chalkboard paint in your organization endeavors is that you can change it up as often as you like. I could see a similar system being helpful to cordon off safe snacks for a family member with a food allergy. This was such a simple and cost effective way to get organized, but it’s also flexible enough that we can stick with it. We’ve been able to keep better track of what we have, and it has made after-dinner clean-up or unloading groceries a breeze. Organizing a new home is definitely an ongoing task, but finding simple solutions that work for your family is the best way to keep things in order.
On to the next project,
Stacy
Jamie’s Little Lovelies
 |
| Leather Pouf Ottoman |
 |
| New Sunglasses |
 |
| Low Carb Mac & Cheese |
 |
| New Pillows for the Sofa |
 |
| Inspired by this new book |
Baby Sprinkle
My dear friend was pregnant with her second child, a little girl. With her first being a boy, I thought it most appropriate to throw her a baby sprinkle so that we could welcome the new little one in true style with nothing but pink and everything girly. I paired with another friend and she hosted the sprinkle at her house. We collaborated and made a great pair with our main goal making sure this sprinkle SCREAMED girly.
We started with a variety of pink and white paper pom poms – hanging from the ceiling, aligning the tables and even a few tossed on the floor.

The invite had a clothes line of bibs, a dress and onsies. We continued that theme with our decor, lining the window and mantel with clothes she could take home.

The Sprinkle was in the afternoon, so we kept the food pretty simple. I made the mom’s favorite strawberry cupcakes and used store bought icing with my icing decorating kit to give it a professional look. I found these pretty paper covers at Micheals, with pink swirls and pink paper flowers on toothpicks to top them off. We also had a fruit and cheese platter with raspberries, grapes, pear, strawberries and brie cheese.

To finish decor, we had washcloth bouquets, tutus draping the food table, rosette filled vases and simple white flowers with “its a girl” ribbon.

We also offered two kinds of punch – spiked and mommy’s punch.
Spiked:
1 can (12 oz.) of frozen pink lemonade concentrate, thawed
1 bottle of champagne (add a little more to taste)
2 cups white cranberry juice cocktail
Mommy’s punch:
1 can (12 oz.) of frozen pink lemonade concentrate, thawed
4 cups white cranberry juice cocktail
1 qt. club soda, chilled
Garnish: fresh mint or sliced strawberries
New Obsession: Horse Decor.
I have a new obsession with horse decor – maybe it’s because I am preppy or my dog looks like a miniature horse or that I am jealous of a friend that used to ride horses. Either way, I am set on buying something for our house.


What are your thoughts? Do you have any horse decor in your house?
Check out our Facebook page for another great lamp option.
Enjoy,
Ellen
Holiday Decorating.
 |
| West Elm |
I am waiting to start decorating for the Holidays until after I throw a sprinkle shower for my sister-in-law of Coordinately Yours and then I will be ready. But, I am dreaming of some new ornaments and decor ideas from Pinterest.
Have you started decorating?
Enjoy,
Ellen
Thanksgiving Decor
With Thanksgiving less than a week away, I wanted to showcase a few easy table top ideas if you are hosting dinner – well what could be easy, I havent tried them myself! I think for holiday table tops, with so many food dishes and other items, simple is best for the decor. Although I added a few pictures at the end, one being a beautiful tablescape, using blues and golds. If I were hosting Thanksgiving this year, I would take this idea and run. I will be hosting for two, my brother and I, but sadly I am not sure he would appreciate a table looking so spectacular. Maybe I will do it and share with you all – I know you will give me a few oohs and aahs! Happy early Turkey day!
Tschues,
Jamie
 |
| This would look great placed in a picture frame in the entrance when guests arrive. |
 |
| Add corn or wheat to glass hurricanes. |
 |
| Add acorns or other nuts to vases and hurricanes with simple white candles. |
 |
| Cut out a small area of mini pumpkins with a spade or flat drill bit, and fill with tea lights or small votive candles (pumpkin/spice scented would be a bonus!) |
 |
| Paint pumpkins with letters spelling out THANKS. |
 |
| Create pumpkins out of strips of construction paper tying them all together with a brown ribbon at the top. |
 |
|
| Incorporate green antique glass, pine cones and acorns, along with other brown and yellow accent pieces. |
 |
| My DREAM table, love the different shades of blue, gold accents and the orange flower center piece…and the chandelier! |
*all photos found on Pinterest searching for Thanksgiving
